Walkthrough for Starfield covers a detailed step-by-step guide on completing the main storyline of Starfield. This page will contain comprehensive guides on how to navigate the required Locations, where to meet key NPCs, how defeat difficult Enemies, where to find important Items, and more in the game. Here, you can find the important details and information needed to explore the vast worlds and systems found in Starfield.
Do note that the Walkthrough page will mainly focus on Starfield's Main Missions and will only touch upon other side missions if they have an impact on the main storyline. Please visit the Missions and the Activities page for a full list of Faction Missions, Miscellaneous Missions, Missions from Mission Boards, and Activities, as well as their specific mission walkthroughs. For a more concise recommended progress path, please visit the Game Progress Route.
Starfield Main Missions in Chronological Order
All Main Missions
Starfield Walkthrough
Starfield Walkthrough Part 1 Quick Navigation
Click to jump to a specific section of the page
The Vectera Mines
As soon as you start the game, you will be introduced to Supervisor Lin and Heller in a cutscene. The three of you have been sent to Vectera on a mining expedition. When you get control of your character, start by following Supervisor Lin to your station. Grab the nearby Cutter from the toolbox and you'll get a basic tutorial on how to fire tools and Weapons. There will be five objective markers that pop up within the mines - each one will be a deposit of Beryllium. Use the Cutter to mine each deposit, then return to Supervisor Lin.

She'll walk you to Heller, who's detecting gravity fluctuations up ahead. Follow them, and about halfway into the cavern, Lin will direct you to continue up the path by yourself. You'll get another small tutorial, this time about how to use your Flashlight, and find more Beryllium deposits on the walls of the cave. Enter the tunnel, and at the end will be a strange rock formation. Use your Cutter on the objective marker to free up the Strange Object and pick it up. You'll have strange visions and black out.
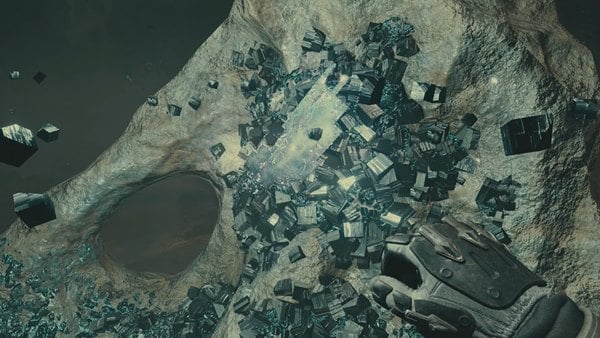
When you come to, Heller and Supervisor Lin will check up on you to make sure you haven't sustained any injuries. At this point, you'll be sent into Character Creation to customize your characters looks and physique, as well as their Backgrounds and Traits. Lin will make a quick comment about your chosen Background after you finish making your choices. You'll then get your first dialogue option when she asks about what you remembered. The conversation will be cut short by an alert.

A short tutorial about switching between first and third-person will pop up at the top of your screen. Follow Supervisor Lin into the airlock and equip a helmet from your inventory. When you exit the airlock, head over towards the ship. You'll be able to find a Med Pack and Eon on a yellow container to your right on the way. By the ship itself, you'll need to speak to Barrett, Lin's contact, about the Artifact you found to progress. VASCO, Barrett's robot assistant will then interrupt, warning you about an incoming hostile ship. Use the Cutter or Eon to get rid of the incoming Pirates and remember to loot all the bodies for extra loot.
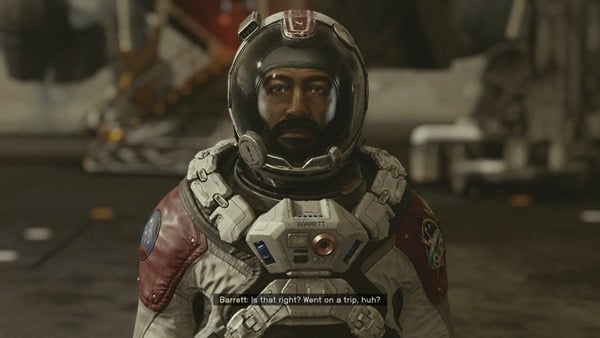
Return to Barrett after defeating the Crimson Fleet. Whether or not you answered him truthfully during your first conversation, he will know that you experienced visions when you interacted with the Artifact and ask you to come with him to Constellation. After a bit of back and forth with Lin, you'll be allowed to leave with VASCO to find Constellation. Barrett will give you a watch as a gift and you'll be able to ask him questions freely about him and what he knows about Constellation.
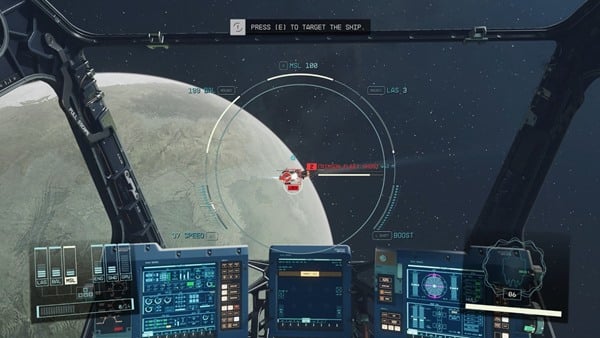
Board the ship to start your journey. You can find some Aid Items in the form of Food on the table inside. Hop into the driver's seat and you'll be given a tutorial on flying Ships by VASCO. This includes a brief combat encounter with a Crimson Fleet Ship. There will be an option to skip this tutorial by switching on all Ship systems if you already know how to fly a Ship. With the Crimson Fleet hot on your trail, VASCO suggests that you deal with one of their captains on a nearby planet - Kreet.
Fighting Pirates on Kreet
When you touchdown on Kreet, you can speak to VASCO to store some of your gear with them if you wish. Continue forward, following the quest marker towards your next objective. On the way, you'll find several Fauna and Flora you can interact with. There will be a short tutorial on how to use your Scanner on these lifeforms to improve your knowledge of the planet.
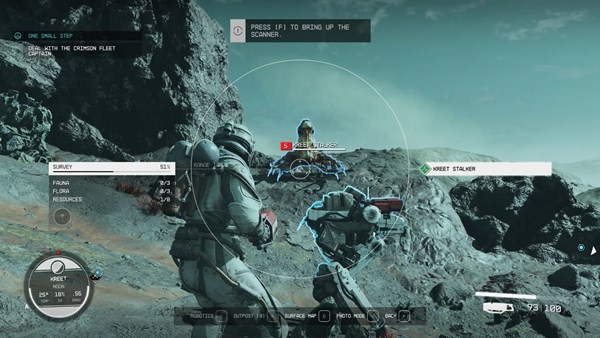
As you approach the quest marker, you'll discover the Kreet Research Lab. Enter the facility and interact with the door. You can look around to loot and read some books if you wish, but to progress head up the staircase. Turn right at the top of the stairs and keep going up the next set of stairs. Continue following the quest marker through a set of double doors, and you'll hear some Crimson Fleet Pirates speaking nearby. Enter the Cafeteria and deal with the three Pirates within.
Head into the Living quarters, where you'll hear more Pirate conversation. If you head into Lab 01 straight ahead, you'll find the five Pirates speaking, including the three on the upper balcony. Climb up the stairs to the balcony, and keep following the quest marker through Research 02. You'll find more Pirates at the top of the next set of steps. Defeat them and enter Storage. Though optional, you can find a safe here that will give you a tutorial on Lockpicking. When you're done with the safe, climb up the ladder nearby to the roof.

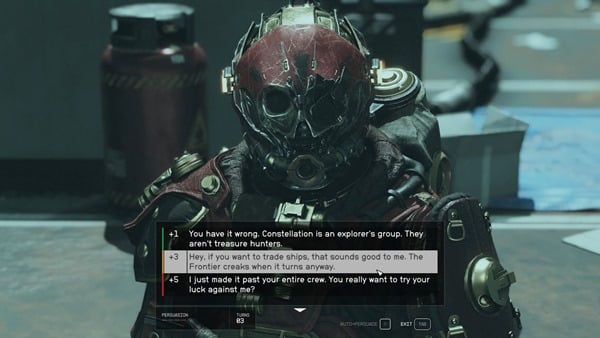
Up top, exit through the door and you'll start speaking with Brogan, the Crimson Fleet captain you're looking for. You can ask him what he wants with Barrett freely, to which he'll answer that he's not after Barrett, but instead his Ship, The Frontier. If you don't attack him just yet, you'll get an opportunity to try and persuade him to back off. Pick the Persuade option and you'll get a quick tutorial on how this dialogue mechanic works. Succeed in the Persuasion and Brogan will let you go without a fight. You can then fast travel to your ship by looking at it through your Scanner.
Meeting Constellation at New Atlantis
Your next destination is the city of New Atlantis on Jemison. You'll have to make the jump from Kreet in the Narion System to the Alpha Centauri System. Before you do so, you'll be able to see how much fuel the journey will consume. Because the two Systems are close by, you should be able to make the jump no problem. When you get to Jemison, a Ship from the United Colonies Security will scan your Ship for Contraband. Once they have determined that you're clean, you'll be allowed to land on New Atlantis.

New Atlantis is huge, and if you walk around, you'll be able to find Vendors and other NPCs that will give you additional Missions or those that will be happy to simply have a quick chat and let you know more about the city. Whenever you're ready to progress, head towards the quest marker to a subway station and select the first option after interacting with the train. When you exit the train at this location, you'll discover the green scenery of the MAST District. Make your way to the right and follow the quest marker to The Lodge. To enter, interact with the door and your character will pull out their watch as advised by VASCO, giving you access to the area.

Open the doors directly in front of you to the library. When you enter, Sarah Morgan will welcome you to Constellation. You will also be introduced to Walter Stroud, Matteo Khatri, and Noel. They'll ask you about your experience with the Artifact, then have a meeting of their own that you can listen to. Place your Artifact onto the table when prompted and listen to the rest of the meeting unfold. After telling Sarah that you'll be happy to join Constellation, One Small Step will end, granting you a Constellation Pack and the Lodge Key.
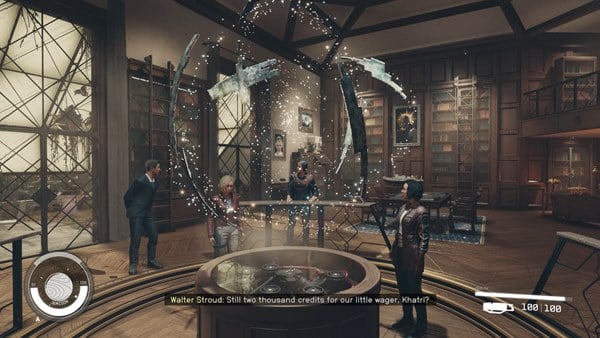
Though Sarah encourages you to walk around, explore New Atlantis, and speak with the rest of the Constellation members, you can speak to her immediately after One Small Step to start The Old Neighborhood. She'll tell you that she got a tip from a contact in the United Colonies Vanguard and asks you to accompany her to the United Colonies Vanguard recruiting office. Sarah will be locked as your follower for this mission once you end the conversation.
The UC Vanguard office can be found at the MAST District as well. Simply follow your quest marker to the MAST building and speak to Commander John Tuala behind the desk. You can start the Faction Mission Supra et Ultra by signing up with him, but to progress this quest, you have to pick the choice to discuss Constellation business. He'll point you towards Moara, a UC Vanguard volunteer stationed at Mars. Mars is in the Sol System, so you'll have to make the jump on your ship there from the Alpha Centauri System.

Travelling to the Sol System
When you get into Mars space, like before, your ship will be scanned for contraband by a United Colonies Ship. When you've been cleared, touchdown at Cydonia on Mars. Follow the quest marker into the Central Hub and enter the Broken Spear Bar to the left. Speak to the bartender, Jack, and ask him about Moara to learn that Moara hasn't been back in a while. Jack will make up a story about how Moara has a huge unpaid tab and he'll only help if you pay it, but if you let Sarah respond to this, she'll call him out on his bluff and lower the price of his information. You can then further persuade him to give you the information for free.

If you do try to persuade him, you'll have three turns to get 4 Persuasion 'points'. Below are some examples of Persuasion options:
- Every minute that passes he could be in danger. (+6)
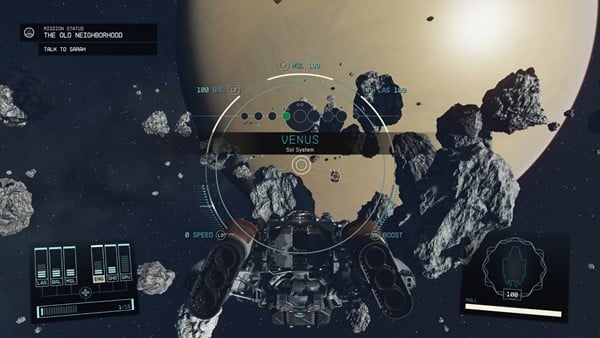
Whether you pay him or not, Jack tells you that Moara was last heading to Venus. The trip there should be short as it's in the same star system. When you get to Venus, you'll have to carefully navigate around some asteroids while remaining undetected from the Va'ruun Zealot Ships. You'll get a small in-game tip on how to minimize ship system power to avoid detection. Make your way slowly to the Satellite Beacon, and you'll hear a transmission when you get there of Moara stating that he's heading to the Nova Galactic Staryard.
The Nova Galactic Staryard is found floating in Luna space, also within the Sol System. Sarah will tell you that the staryard hasn't been run for a while and to be careful when boarding. The game will give you a quick tutorial on docking and boarding starstations and ships here. Board the Nova Galactic Staryard when you're ready and enter the main staryard.
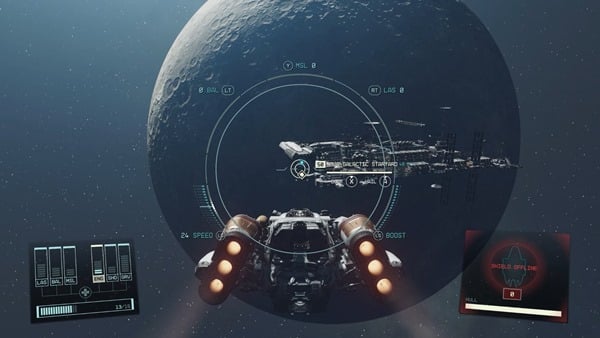
As you navigate through the staryard, you'll have to fight several Spacers. Follow your quest marker to the Control Room and take the stairs up to the upper level of the room. Take the next set of stairs up into the Workroom. The door on the left will need to be lockpicked to be accessed, but contains a storage crate. Continue to the right and head down the stairs into a cargo bay. Make your way further down and follow the quest marker to find Vanguard Moara's Slate. You'll learn that Moara plans to draw out the Spacers to Neptune to try and get rid of them.
When you get to Neptune, Sarah will point out a lone spaceship drifting out in space. As you approach it, you'll hear comms from Moara Otero asking for help to deal with the mercenaries that hijacked his ship. Shoot down the ship's engines and you'll be able to board without destroying it. Fight your way through the Spacers - the quest marker will move on to the next Spacer every time you defeat one. When you've dealt with all of them, you can speak to Moara at the cockpit of the ship. Ask him for the Artifact and he doesn't put up much of a fight for it. You can then take the Artifact back to the Lodge in New Atlantis to finish the mission.
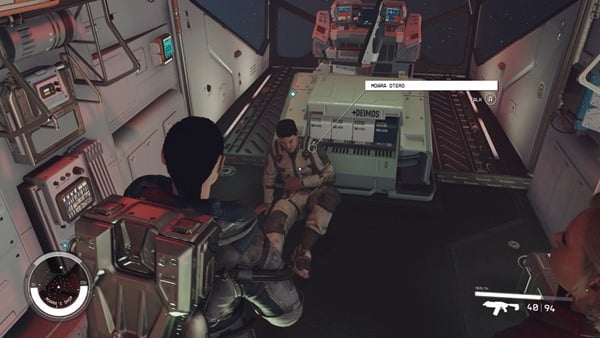
After the mission ends, you'll unlock three new Main Missions - The Empty Nest, Into the Unknown, and Back to Vectera. You can complete each mission in any order, but all three must be completed in order to progress the main storyline.
Visiting Akila City
This section will cover the Main Mission The Empty Nest. Sarah will ask you to speak to Sam Coe to ask him more about an expedition he's planning on running. Head into the gardens of The Lodge to find him with his daughter, Cora Coe. When you ask Sam about the expedition, he'll inform you that the three of you are heading to Akila City on Akila to find another Artifact.
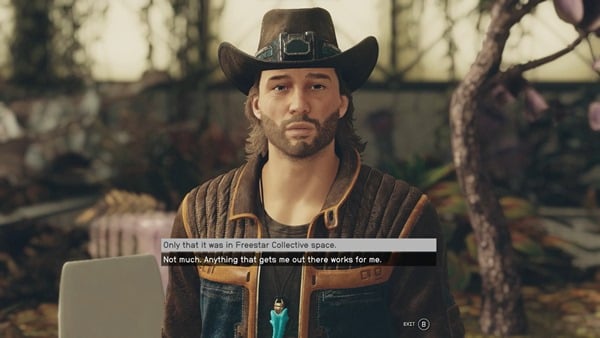
Fly over to Akila in the Cheyenne System, where you'll be scanned for contraband by the Freestar Rangers, and touchdown at Akila City. Speak to Sam by the entrance to the city to learn the details of what you'll be doing on Akila. He'll be locked in as your Companion for the mission after speaking with him. Your first course of action is to head to the GalBank vault to find maps created by one of Sam's ancestors. As you approach the bank, you'll be stopped by a security guard warning you that there's been a bank robbery. You can offer to help, to which you'll gain Sam's approval.
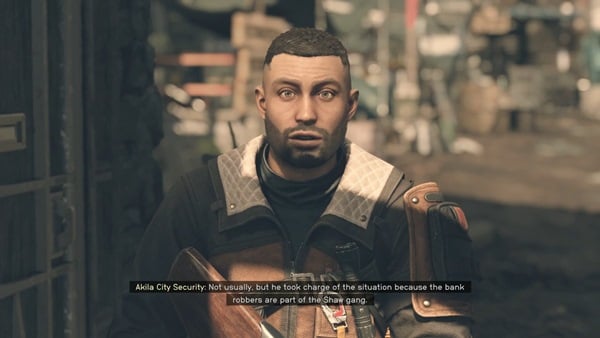
The Faction Mission Job Gone Wrong will begin here and must be completed before being able to search GalBank. After you do so, return to the bank and head downstairs into the vault. There will be multiple quests markers here leading to different storage lockers. The one you're looking for a storage lock containing the Note for Sam. If you read the note, you'll learn that Jacob Coe took all the maps, knowing that Sam would be back for them.

Speak to Sam, and if you want to, you can Persuade him to tell you who Jacob is. You'll have three turns to get 4 Persuasion 'points'. Below are some examples of Persuasion options:
- We're going to the estate anyway. I'm going to find out. (+2)
- We can't work together if you don't trust me. (+2)
Succeed in the persuasion and he'll tell you that Jacob is his father and that they're not on good terms. You'll then have to follow your quest marker to the Coe Estate to speak to Jacob. He refuses to give up the maps due to his feud with his son. Speak to Sam once more and you'll have three options - you can try to convince Jacob to give up the maps, you can ask Sam to distract Jacob while you sneak in for the maps, or you can ask Cora to help convince Jacob to give up the maps.
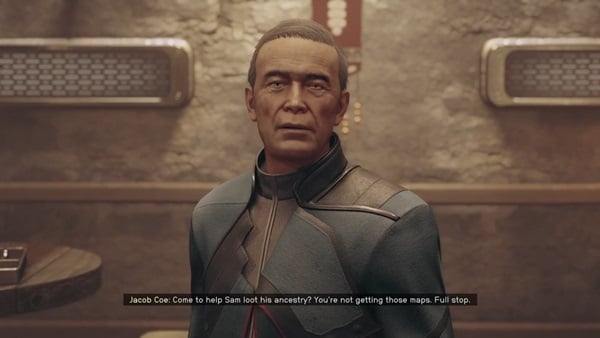
If you choose the first option, you'll have to speak to Jacob and Persuade him to cooperate. You'll once again have three turns to get 4 Persuasion 'points'. Below are some examples of Persuasion options:
- Constellation just wants to follow up on Solomon's work. (+2)
- The sooner you agree, the sooner we're out of your house. (+4)
Jacob will relent and give you the key to the room he's standing in front of if you succeed. Grab Solomon's Maps found on top of one of Jacob's drawers. Sam will deduce that the Artifact can be found in a cave within Shaw Gang territory. The Empty Nest can be found on Akila as well, so all you have to do is run towards the next mission marker.
When you get to the Empty Nest, start sneaking because the area has turret defenses that will gun you down very quickly. You'll find the Turret Control system in a small tent right on the outskirts of the Empty Nest. You can either deactivate the turrets or calibrate them to protect you. Move towards the next mission marker, defeating the Shaw Gang members on the way. Upon reaching the mission marker, enter the Empty Nest.

Defeat the Shaw Gang members at the entrance to the cave. One of them will drop the Shaw Gang Cave Key needed to unlock the gate ahead. Continue forward into a cave full of Antimony and Caelumite. Down and at the end, you'll find another Artifact you can pick up - Artifact Chi. Another bout of visions will enter your mind, but you won't black out this time. Leave the hideout with Sam once you obtain the Artifact.

As soon as you exit the Empty Nest, you'll be confronted by Shaw herself. She'll demand payment for the loss of her hideout, but can be persuaded to back off in exchange for nothing. To do this, you'll have three turns to get 6 Persuasion 'points'. Below are some examples of Persuasion options:
- We got past all your crew before. You fight us, you'll lose. (+4)

Succeed and she'll let you leave peacefully. Before you get to leave, however, an Ashta will appear and attack the hideout. It's optional to help the Shaw Gang deal with the Ashta, but if you do, Shaw will reward you with a Boosted Razorback. Return to the Lodge and place the artifact you found with the rest. Partake in the Constellation meeting and the quest will end, with you unlocking Sam as a potential Companion.
The Eye
The next two sections will cover the Main Mission Into the Unknown. Sarah asks you to check up on Vladimir, the Constellation member that runs Constellation's starstation - The Eye. The Eye can be found orbiting Jemison within the Alpha Centauri System. Fly over and dock with the station to be able to board it.
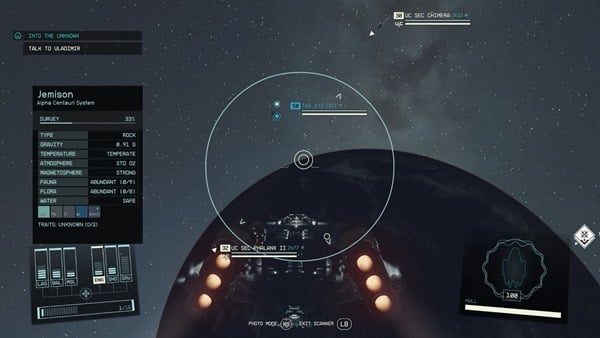
Vladimir Sall can be found sitting behind a desk at the end of the starstation. He'll mark your starmap with two possible Artifact locations and ask you to find Andreja, another Constellation member who's been out in the field for a little longer than he would like. If you ask him about his history with the Crimson Fleet, you can begin the Activity Visit Vladimir's House. From here, you'll have the option to visit Procyon III or Nira. The order you visit the two planets don't matter, but both must be visited in order to progress the mission.

Procyon III can be found in the Procyon A System. If this is your first time visiting the planet, you'll receive a transmission from Mrs. Whitmore. Her ship, along with her class, have been stranded here due to the break down of their ship's Grav Drive. If you agree to help them, you can give her 10 Ship Parts to repair the leakage. After that's all done, touchdown on the Occupied Cave to progress the main mission. Run over to the quest marker and enter the Cave. As you make your way through this cave, you'll encounter some Pack Coralbug Stalkers. Make your way up the slope to the right as you enter, then turn right into the next cavern when you can.
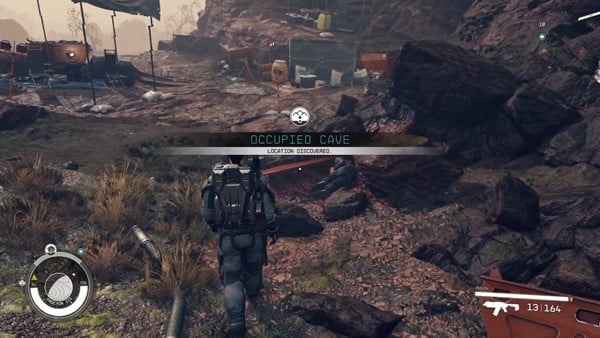
If you drop down into the ravine below, you'll find an Industrial Crate with an Epic Shocktroop Spacesuit. To progress, keep heading up towards the mission marker. You'll eventually get to a cavern filled with Caelumite and can find the Artifact within some ore. Dig out Artifact Zeta and you'll be done with the area.
Nira can be found in the Narion System. Touchdown on the Abandoned Mine when you get there and make your way to the mission marker, defeating any Sirens you encounter on your way there. As soon as you enter the Deep Cave, you'll find Andreja. Identify yourself as a member of Constellation, and she'll start following you as a Companion for this mission. At the corner up ahead, you'll find a Computer that will allow you to either switch off the robots in the area or calibrate them so that they fight for you. Head further into the cavern, circling around the slope to the side. The Spacer at the bottom of this slope may have a chance to drop a Legendary Navigator Spacesuit.

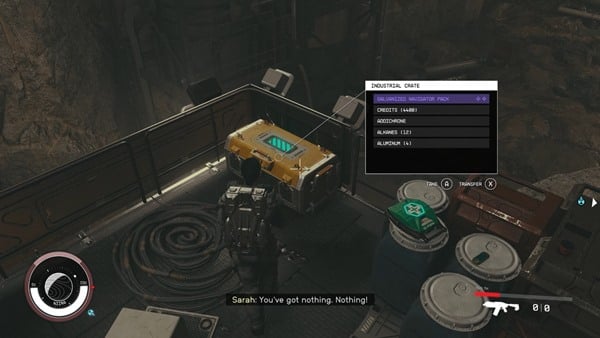
Head through the door on the opposite side of this cavern and in a Weapon Case to the right, you'll find an Epic Grendel. Continue up the slope and into another, larger cavern. Follow the pathways and staircases down to the very bottom, defeating any Spacers in your way. One of the Industrial Crates on a rectangular platform will have an Epic Navigator Pack. At the mission marker, you'll find the Artifact, Artifact Iota, within some Caelumite. Mine out the Artifact and pick it up. When you come to, Andreja will check up on you and ask that you keep her violence against the Va'ruun Zealot earlier to yourself.
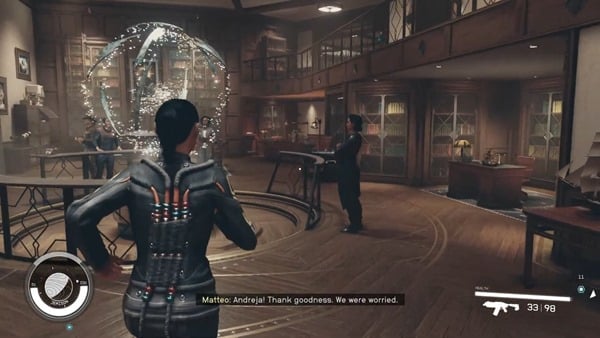
With two more Artifacts in hand, return to the Lodge at New Atlantis to add them to Constellation's collection. Speak to Matteo, who you can start a friendly competition. Andreja will also be unlocked as a Companion for future Missions. Vladimir will pipe in through your communications device, asking for you to meet him at The Eye after getting some new, strange readings on the scanner. Fly up to The Eye and speak to Vladimir. He'll direct you back to Procyon III, where The Eye's scanners have picked up an even bigger Artifact reading, the only issue being that he can't it's exact location.
Gaining your first Power
Journey back to Procyon III in the Procyon A System. There will be a new place to land - the Scanner Anomaly. Touchdown and pull up your scanner. If you look around you, you'll find that there are some places that will glitch your UI out when you look at them. Follow these distortions to Temple Eta. When you enter, you'll find yourself a room with some form of anti-gravity field. You'll get a short tip on floating in these types of scenarios at the top of your screen. Your goal now will be to fly into the spinning concentrated bundles of stars that appear randomly in the room. Each time you fly into one, the three rings in the middle of the room will spin quicker and the time needed to reach the next bundle of stars will decrease.
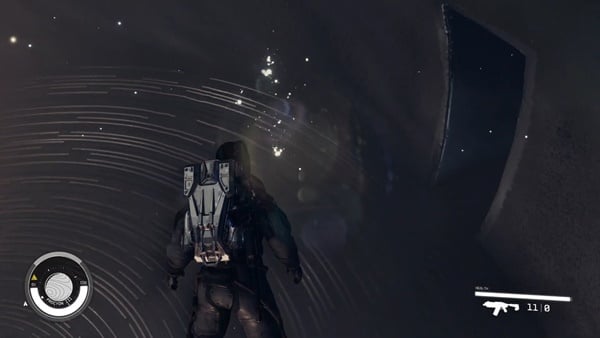
After flying into about seven of these star bundles, the three rings will line up, and you can fly into them to receive your first Power - Anti-Gravity Field. You'll get a short tutorial on how Powers work and how to equip them through the Powers menu. Return to the Lodge at New Atlantis and approach Vladimir to get someone to check up on you. You'll be asked to perform Anti-Gravity Field during the meeting. Afterwards, Vladimir will bring up a theory about each Artifact having their own temples. If you can find these temples, you may be able to gain even more Powers. From now on, you can visit Vladimir from time to time to see if he's picked up any new temple readings and if you land on a planet with a temple, you will be notified.

Into the Unknown will end after the meeting concludes. You will also unlock the Miscellaneous Mission Power from Beyond to track the temples you've visited and those yet to be visited.
Back to the Beginning
This section will cover the Main Mission Back to Vectera. Barrett hasn't been heard from since your initial encounter at Vectera, so Sarah suggests returning to the moon to check up on him. Fly over to the Argos Extractors Mining Outpost on Vectera in the Narion System. When you get there, speak to Supervisor Lin and she'll tell you that Heller and Barrett got kidnapped by another group of Crimson Fleet pirates. She's tried looking for their locations through the comms computer but the pirates destroyed it before she could.

Follow the mission marker to the Communications Building and use the switch at the bottom of the steps to open the orange door. Activate the airlock with the past the door, and you're free to roam around the comms building. Here, you'll have to find three Power Cells and feed them into the Power Receptacle to get the power back up and running to fix the Communications Computer. Alternatively, if you have a point in Security, you can instead simply lockpick the door and download the audio transmission onto a slate. If you do the latter, listen to Emergency Transmission 01 from your inventory to find coordinates that Barrett sent to the mining outpost. Return to Lin to tell her what you've found, and at this point, you may also recruit Lin to be a part of your crew.

The coordinates Barrett sent point you to Dalvik, another moon in the Narion System. Touchdown on the Crashed Ship and run to the mission marker. You'll find Heller on his own, injured, but alive. He'll explain that Barrett got taken by yet another group of Crimson Fleet Pirates, but left another transmission with coordinates. Listen to Emergency Transmission 02 and this time, he points you towards Bessel III. Before you leave, you can recruit Heller to your crew.

Bessel III can be found in the Bessel System. Touchdown on the Ransacked Research Outpost when you get there. You'll soon find that the outpost has been turned into a Crimson Fleet base and that there are several turrets littered around the area. Run to the Crimson Fleet Outpost at the mission marker, ducking and weaving in between cover. When you enter, there will be no hostiles, letting you roam around and loot stuff as you please. At the end, you'll find Barrett having a friendly conversation with a Crimson Fleet Captain - Matsura the Grim. He'll offer you release Barrett in exchange for 4000 credits, but can be persuaded to let him go for free. If you choose to Persuade him, you'll have three turns to get 6 Persuasion 'points'. Below are some examples of Persuasion options:
- You clearly get along with Barrett. You're friends. (+2)
- Look, Barrett is more trouble than he's worth. A lot of pirates are already dead. (+4)

After Barrett has been 'rescued', return to the Lodge at New Atlantis. Speak to him there and he'll be unlocked as a potential Companion during your travels.
Starfield Walkthrough Part 2 Quick Navigation
Click to jump to a specific section of the page
A Commercial Kerfuffle
After finishing The Empty Nest, Into the Unknown, and Back to Vectera, Walter Stroud will call you over to discuss something. He asks you to accompany him to Neon to buy an Artifact possibly stolen by the seller. Make your way to Neon, a city on Volii Alpha in the Volii System. You'll be scanned for contraband by the Freestar Collective Ships, and once you've been cleared, touchdown at Neon.

Speak to Walter at Neon and he points you towards the Stroud-Eklund offices. Pass through the checkpoint and follow the mission marker to an elevator. Choose the button going up to the Stroud-Eklund Corporate HQ. Speak to the receptionist, Oscar Trinidad, briefly and you'll eventually be introduced to Issa Eklund, Walter's partner. Walter will ask Issa for all of the company's discretional funds in order to purchase the Artifact. Issa will offer some advice in investigating the seller and securing the Astral Lounge in case anything goes wrong. Walter will give you 1000 Credits to spend on preparing for the meeting.

Return to the elevator and head down to the Lobby. Follow the mission marker to Newill's Goods and speak to James Newill. You may start the Miscellaneous Quest All for One by asking him about Sieghart. To progress the mission, mention that he set up a meeting with Walter Stroud recently. You can pay him 2500 Credits for him to cough out the information, or you can Persuade him to make the information free. If you choose the latter choice, you'll have three turns to get 4 Persuasion 'points'. Below are some examples of Persuasion options:
- You already got paid for connecting the seller to Walter. We're not paying twice. (+4)

He'll tell you to that one of his workers tailed the seller back to Sleepcrate One. Follow the mission marker the unit at Ebbside. When you get there, the door will be locked. Lockpick the door with some Digipicks, then enter and read all three Personal Correspondence on the computer. You'll learn that the seller has been blackmailed due to the Artifact.
Return to Bayu Plaza and this time follow the mission marker to the Astral Lounge in the Trade Tower. Speak to Boone Morgan at the other end of the bar. Tell him that you're worried about security and if you choose the option saying that you want security to be on your side if a fight broke out, he'll offer you the Astral Lounge VIP package for 4000 Credits. He can be Persuaded to provide it for a lower price, however. If you try to Persuade him, you'll have three turns to get 4 Persuasion 'points'. Below are some examples of Persuasion options:
- You lower the fee, I'll be sure to stop by the Astral Lounge every chance I get. (+4)
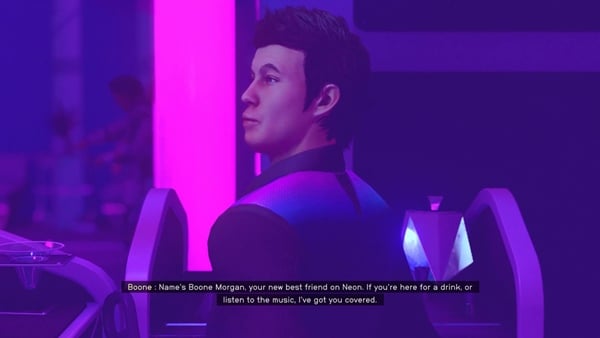
If you succeed, you can buy the VIP option for just 1000 Credits. Your next course of action will be to check the door controls to the Astral Lounge. Head into the elevator to the VIP Lounge. Circle over to Booth 3 and interact with the computer to start a lockpicking minigame. When you succeed, you can read the Remote Door Control message to see that it has been programmed to lock with an approved hand gesture.
Will all the preparations finished, return to Walter at the Stroud-Eklund Corporate HQ. Speak to him to get him to follow you, then return to the Astral Lounge. Speak to Walter to learn the code phrase required to identify the seller - "Ramsay and Travers". The seller's name is Musgrove and can be seen leaning on the wall near Boone with a suitcase by his feet. Give him the code phrase and return to Walter. He'll tell you not to worry about the credits you spend and focus on securing the Artifacts without being killed.
Use the elevator to get up to the VIP Lounge where Musgrove is already waiting. You'll be asked to sit, to which you can agree to. As Walter predicted, Musgrove asks for double the initial price settled. If you call him out on the fact that he needs money, he'll tell you that he needs the extra money to escape from those threatening him. You can keep calling Musgrove on his bluff that he'll cancel the deal if he's not paid double, and he'll eventually relent for the original price.

When you leave the booth, you'll be confronted by a Slayton Agent stating that the Artifact belongs to Slayton Aerospace. You can choose to attack him, with Neon Security since you have VIP privilege, or you can talk him down. If you choose the latter, you'll have three turns to get 6 Persuasion 'points'. Below are some examples of Persuasion options:
- Beating up people like you is how I get my kicks, you know. (+5)
- I'm getting real tired of all the scumbags in this city. Let us go, or you're dead! (+6)
If you succeed, you'll be able to leave without a fight. When you get to the exit of the Astral Lounge, you'll find Issa waiting for you. Speak to her to learn that Slayton has put a bounty on your heads and your ship has been impounded. Walter will suggest going to speak to Slayton, to which Issa agrees on, pointing you towards the Slayton Aerospace offices in the Trade Tower.
Exit the Astral Lounge and enter the elevator within the Trade Tower. Choose to alight at the Slayton Aerospace floor and speak to Ryleigh behind the counter. Your only options forward here are to either attack or Persuade her to let you see Nicolaus Slayton. If you do the latter, you'll have three turns to get 6 Persuasion 'points'. Below are some examples of Persuasion options:
- [Commerce] I have an exciting business opportunity to discuss with Mister Slayton. (+3)
- It can't wait. You need to let me through. (+3)

If you succeed, she'll give you the access code required to use the elevator. If you don't, you'll have to take the Executive Level Access Code from the security office nearby. Note that doing this will aggro the guards in the building. Take the elevator up to the Executive Level. The elevators will stop in the middle and you'll hear an intercom message from Slayton. Luckily, Issa will be able to override the elevator controls and let you out. Follow her instructions and head into the vent to your right. She'll guide you over the elevator, into a conduit room, and into another set of vents. Head down the open hatch and continue following her instructions. If at any point you go against her instructions, you'll be forced to fight through the floor.
Issa will eventually lead you to a series of catwalks outside the building itself. Even if you've managed to get this far by sneaking around, you'll have to start fighting Slayton Security at this point. Follow the catwalks around and up to the next floor to get to a door leading back inside. When you make it to the end of the hallway, you'll get to confront Nicolaus Slayton. If you speak to Nicolaus rather than attack him, you can bring up an opportunity for business between him and Walter. He'll express an interest in the deal, but wants you to deal with Musgrove for the humiliation he caused.

Musgrove can be found in the next room, heavily injured. You can choose what to do with him - let him go, put him in jail, or finish the job. Slayton will make a quick comment about your choice, then let you go. The Industrial Crate in the room will have a Rare Navigator Spacesuit you can take freely. When you're done with the place, exit the building using the elevators and return to your ship at the Spaceport. Walter will have a few things he wants to say to you, then you'll be free to take off from Neon.
When you leave the planet, you will get a transmission from the Helix. They introduce themselves as the Starborn and demand the Artifact, even willing to use force to take it. Walter will suggest you make a run for it, Grav Jumping to any place. You can follow his suggestion, or give up the Artifact. This interaction will end All That Money Can Buy and push you straight into Starborn.
The Starborn
- Surrender the Artifact
- Or Grav Jump to Anywhere.
You have two options at the end of All That Money Can Buy. If you choose to surrender the Artifact, the Helix ship will leave you alone peacefully. Afterward, you will need to make your way to The Lodge for the meeting.
If you choose to Grav Jump to Anywhere you will then still be tasked to attend a meeting at The Lodge in New Atlantis . Once you arrive at The Lodge, speak to Noel. If you ask her to look at the data from your ship sensors she will go ahead and transfer the data. Listen to what they have to say then speak to Noel. Have a seat and listen to the meeting.
- I'm with Sam. That starship design could easily be human.
- To Barrett's point, the Artifacts clearly aren't human-made.
- Matteo's metaphor has merit. They acted like they were judging us.
You will gain approval from whoever you agree with. After the meeting approach the Artifact Collection and activate it to complete Starborn.
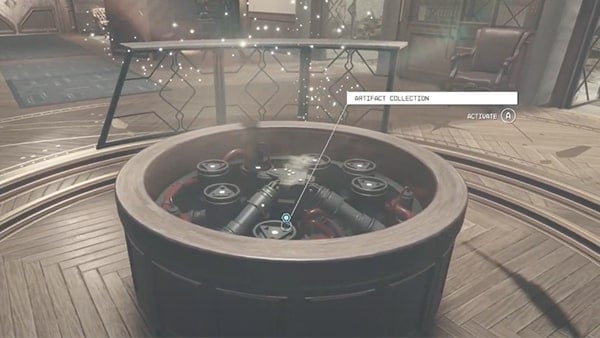
Speak to Vladimir Sall after the meeting. Your interaction will be followed up with additional objectives that will take you to travel to different Planets. These Planets may vary from playthrough to playthrough. Track the quest to mark your next location then travel there. With the quest tracked, you should be able to continue following your objective marker.
- Find the Artifact on BodE
- Find the Artifact on Procyon VI-B
Your objective markers may lead you into a facility guarded by Space Pirates. Make your way through the facility while pursuing the mark. The artifact itself may be guarded by Starborn Enemies. Extract the artifact and take it when you can reach it. You will need to repeat the process on the second listed planet, obtaining a second Artifact. Once you have obtained both artifacts, return to The Lodge to begin Power from Beyond. Add your newly obtained Artifacts to the Collection.
After you have added the artifacts, approach Matteo in the Lodge and speak to him and he will start to question their work. If you agree with him, everyone else will not appreciate your answer.
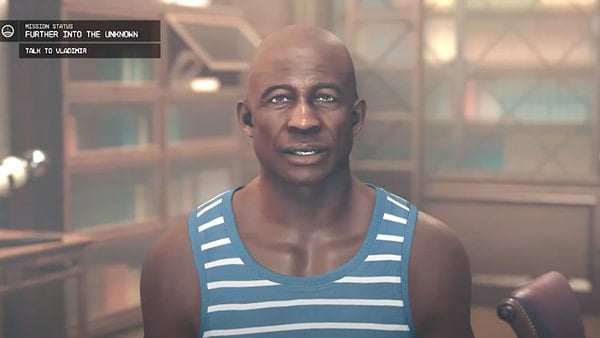
During your interaction, Vladimir Sall will also want to speak with you to bring up a favor. He needs help with some repairs at The Eye. This will help with locating Artifacts further away. Agree to help him and Short Sighted will begin shortly after Further Into the Unknown.
Fly up to the Eye and you'll be given a few tasks to do around the station. Barrett will ask for help in testing the starstation's connectivity, Sarah will ask you to pick up a wrench from nearby, Sam Coe will ask for help welding the panel he's working on, and Andreja will ask you to help her assemble some parts. You'll end up breaking something, but return to Vladimir and the mission will end, leading into No Sudden Moves. Note that whichever Companion breaks what they're working on will be stuck on The Eye for the next couple of missions.

The Race for the Artifacts
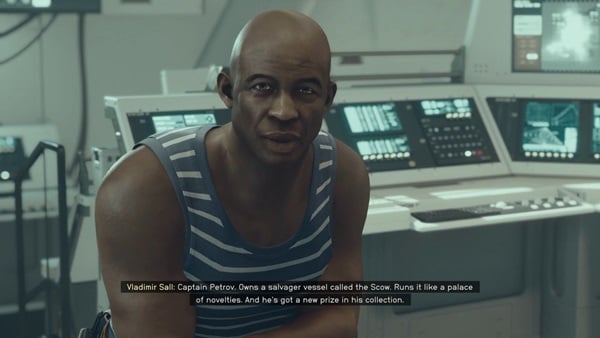
Speak to Vladimir in The Eye and he will talk about a job which involves stealing an Artifact from Captain Petrov. The Companion he sends you with will differ form playthrough to playthrough. If you say you're ready to go now, your companion will be locked as your follower for the mission's duration. You will then need to travel to The Scow, Captain Petro's salvage ship. Track the quest to mark your destination. Make your way to the Scow in the Procyon A System. You will have 2 additional optional objectives aside from boarding the Scow.
- Board the Scow
- (Optional) Disable the Engines
- (Optional) Talk your way in
Once you locate the Scow, hail it to be able to interact with them. They will say they're not taking any visitors. You will have a few options.
- [Persuade] I have business with Petrov. It's important.
- [Attack] Prepare to be boarded!
- [Sam Coe] "We've got a lot of one-of-a-kind pieces for sale."
- [Barrett] Tell Petrov his buddy Barrett is here to see him.'
- Fine. We'll leave you be.
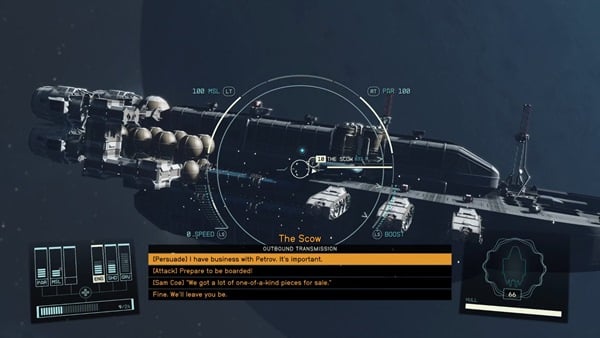
If you have Barrett with you and choose his dialogue option, Barett will like that, but he will continue to refuse his entry. If you have Sam with you instead, he'll give you passage to the Scow immediately. If you your companion dialogue option doesn't work, you can continue to choose from the other choices. Try to Persuade him, and you'll have three turns to get 4 Persuasion 'points'. Below are some examples of Persuasion options:
- I've hear stories about your magnificent ship. I just want to see it for myself. (+2)
- We're just here to trade. Nothing Else. (+4)
- I'll bust through if I have to. Don't make me use force. (+5)
Succeed with your persuasion and you will have successfully talked your way in, fulfilling one of the optional objectives. They will then let you board the Scow and you will need to locate Captain Petrov.
Head up the stairs and interact with the switch up ahead to open the door in front of you. Tao Xun will stop to ask what your business is but after telling him you're after the Artifact, he'll let you through. Keep heading forward, up some stairs, through an unlocked gate tot he right of a guard, then through the hallway on the left. Keep zigzagging through the various hallways towards the mission marker, and at the end, you'll find Captain Petrov.
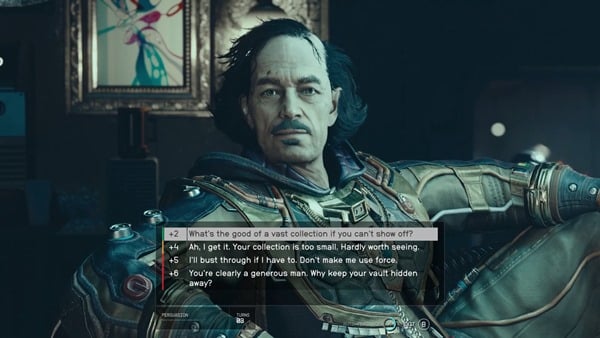
Speak to him and when you tell him you're looking for his Artifact, he'll say it's not up for grabs. If you have Barrett with you, he'll easily persuade Petrov to show you his collection. If you have another Companion with you, however, you can try to Persuade him yourself instead. You'll have three turns to get 6 Persuasion 'points'. Below are some examples of Persuasion options:
- What's the good of a vast collection if you can't show it off?. (+2)
- I'm with Constellation. We want to catalogue your relics! (+2)
- [Scavenging] How about some professional courtesy? We're both collectors here. (+4)
- Ah, I get it. Your collection is too small. Hardly worth seeing. (+4)
If you succeed, he'll take you on a tour to show off his collection. If you don't you'll either have to start a fire fight with the Pirates, pick the lock to the vault, or pickpocket the key to the vault. If you fight Petrov now, he'll surrender after getting to low enough health, letting you take the Artifact without further consequence. Either way, get into the vault and head downstairs. Head to the very end and turn left and continue down the stairs here. There'll be another vault door and through here, you'll find the Artifact.

If you followed Petrov down here, you'll have to steal the Artifact in front of him as he will not be willing to sell it. Like earlier, take this health down low (you can deplete his health without consequence) and he'll surrender, letting you walk out of the Scow without anymore violence. Make sure to get him quickly, however, as he'll try to run away, leaving you to fend for yourself against his lackeys. When you've gotten Artifact Phi, return to the Frontier and set a course for New Atlantis. Make your way back to The Lodge to add it to the collection.
A Critical Decision
At the end of No Sudden Moves, Noel gets a message from Vladimir at The Eye. Speak to her to learn that The Eye was attacked by the Starborn. One of your Companions left behind on They Eye is in critical condition, but Vladimir insists that you stay behind at the Lodge to protect the Artifacts. You'll have to make a decision here - defend the Lodge from the Hunter or help Vladimir and the other Constellation member at The Eye.

If you decide to stay at the Lodge, head upstairs to the bar and check on Walter. You'll find the Hunter has already infiltrated the Lodge and is attacking him. Shoot the Hunter a few times to get him off Walter and hold him off until Noel has all the Artifacts ready to be moved. When she calls out that she's ready, join up with her and follow her down into the basement, then through the side door into The Well. Make sure to stay near her at all times to avoid her stopping at random locations.

Escort your fellow Constellation members through The Well and into the elevator heading up to the Spaceport. Continue following them until you get to your Ship. Board it, and take off from Jemison. Once you get into orbit, Scorpius will send a transmission commending your persistence. If you pick the non-attack option, the Starborn will leave you alone for now, allowing you to peacefully get to The Eye. When you get there, you'll find whoever was in critical condition earlier now dead in the halls. Check up on your other Companions and Vladimir to find them injured, but alive.

If you decide to go to The Eye to check up on Vladimir and your injured Companion, leave the Lodge through the front doors. You'll be approached by the Companion that accompanied you during No Sudden Moves, making sure you're positive about your decision to leave as they'll be barricading the door soon. Tell them you're sure, then make your way to The Eye. Talk to all your Companions and Vladimir to help them get back on their feet. Once that's done, return to The Lodge with everyone.
Unfortunately, your Companion at the Lodge will be found dead in the library. After finding them, you'll find Vasco at the back of the library, Matteo in the gardens, and Walter in the bar upstairs. They'll tell you that Noel escaped into The Well with the Artifacts in hand. Head down to the basement and take the side door here to The Well. Right ahead, Noel will be cowering by the staircase. Speak to her and the Hunter will appear. Like above, escort Noel onto your ship and fly to The Eye. The Hunter will give up chase once you're up in space.
No matter which route you took, your next course of action is to speak to Vladimir and Noel. With The Lodge and The Eye now compromised, you now need to keep the Artifact somewhere inconvenient for the Starborn to take them. You can choose to either store them on your mobile Ship, or a defensible Outpost. Do note that the place you build the Armillary at will be more prone to Starborn attacks.

When you're done building the Armillary, return to The Lodge on New Atlantis. You'll be informed that the deceased's belongings have been moved to a storage container in the basement. Speak to Matteo and he'll inform you of a pattern he noticed while the Hunter was attacking - they kept mentioning 'Unity'. He suggests visiting the priest of Sanctum Universum to see if he can glean any meaning from the phrase.

Searching for Answers
You'll find Matteo speaking to Keeper Aquilus outside of the Sanctum in New Atlantis, just opposite to the Freestar Collective Embassy. Join the conversation and tell him you want to talk about Unity. He'll usher you into the Sanctum Universum for some privacy.

Sit at the table and tell Keeper Aquilus about your experiences. He'll tell you an old story about a pilgrim finding the 'true meaning of Unity' and gives you the phrase 'Infinitum Addendum'. You'll be suggested to speak to a member of House Va'ruun and the House of Enlightenment, both of whom may have different versions of the story.
The House of Enlightenment can be found in The Well on New Atlantis. Follow the mission marker down to meet Andy Singh. Tell him about Keeper Aquilus and the Pilgrim. He'll tell you a story not of the Pilgrim, but instead of the Drifter, with the 'second' person being brought up a lot. In his interpretation, 'Unity' would mean 'the One'.

The House of Va'ruun prisoner, Mir'za, can be found at the UC Security Office in the Spaceport of New Atlantis. Head in and walk all the way to the left to find her. Speak to her through the cell and she tells you the story of the Unbeliever, 'four' fights over 'one hundred and twenty' days given by the Great Serpent to test the faith of Va'ruun. In her interpretation, 'Unity' is a shadow cast to deceive the faithless.

Return to Keeper Aquilus at the Sanctum Universum. Give him the three numbers and code phrase you obtained previously and you'll help Keeper Aquilus connect the dots between each story. You'll be pointed towards the second planet in the Indum System, at the coordinates 4,120. Before you leave, Keeper Aquilus will ask you what your interpretation of 'Unity' is, to which you can answer freely.
Hop onto your ship and fly to Indum II in the Indum System. Touchdown on Pilgrim's Rest. Take your scanner out and walk into the building. In the greenhouse-type building, you'll find Pilgrim's Writing 3 and Pilgrim's Writing 4. In an open area covered by some tarp is Pilgrim's Writing 2. Pilgrim's Writing 1 can be found in a makeshift shack, and in the inner room, you'll find Pilgrim's Writing 5. These writings give you clues on how to unlock the locked door inside the shack. These are the options you should choose in order to do so:
- What is the Unity?
- People are necessary. But people are madness.
- Myself.
- In stopping. In embracing compassion.

You'll be allowed into the locked room after getting all four answers complete. Inside, you'll find Trackers Primer 02 that permanently increases your ballistic weapon damage by 5% and a Rare Sidestar inside one of the Storage Boxes. More importantly, you'll find the Pilgrim's Final Writing that points you towards Hyla II.
Hyla II can be found in the Hyla System. When you get there, you'll find a Crimson Fleet Reaper and will have to fight it while navigating through an asteroid field. If you manage to defeat it, you'll receive a transmission from a UC Ship offering a reward for your help. When you're done with that, touchdown on the Ancient Ruins. Head to your mission marker to find a peculiar looking ruins. On the circular platform, you'll find a beam of light shining down on an until constellation. Using the glyph, move the beam of light so that each point in the constellation is lit up. If you press on the upper part of the Glyph, the beam of light will move upwards, if you press the left part the beam will move left, and so on.

When you've completed the constellation, the ruins will point you to the final star in the Scorpius constellation. Make your way to Oborum III in the Oborum Prime System and the mission will end, leading into In Their Footsteps.
When you get to Oborum III in the Oborum Prime System, the Hunter will send a transmission to your ship. He'll invite you onboard his ship and introduce you to another Starborn, the Emissary. Dock with the Scorpius to be able to board it.
When you speak to them, you'll learn that the Emissary was the pilot of the Helix, the ship that initially threatened you in Volii Alpha space during All That Money Can Buy. While they meant no harm, they wanted to warn you off collecting the rest of the Artifacts as other Starborn are after them too, and are not as civil. The conversation will eventually turn towards Unity, where the Emissary reveals themselves to be the Companion who died during High Price to Pay. They come from a different universe and in theirs, you were the one to die in their place. As you talk more about Unity, the Hunter reveals his identity - Keeper Aquilus from another universe.
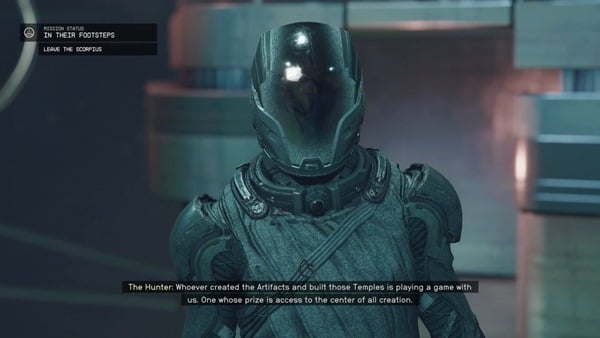
The Emissary and the Hunter each offer you different ways to approach the Unity. The Emissary wishes for a truce between the three of you, wanting to be selective of who gets to access the Unity, while the Hunter believe that rules and constraints are a way for those in higher power to control those under them and wants the Unity to be accessible to all. You can speak to both of them to learn more about their motivations and goals for their actions, as well as what it means to be Starborn.
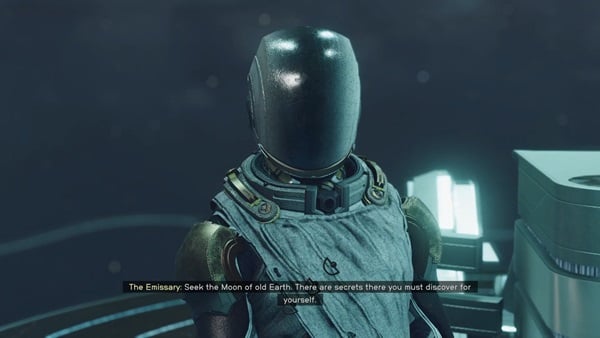
As you leave the ship, the Emissary will call out to you one more time. They'll give you some information to help you seek out the rest of the Artifacts in this universe, and suggest you discuss with Constellation what to do next. You'll then unlock three new Main Missions - Unearthed, Final Glimpses, and Missed Beyond Measure. These Missions can be completed in any order, but all must be completed in order to progress.
Starfield Walkthrough Part 3 Quick Navigation
Click to jump to a specific section of the page
Fly Me to the Moon
The following sections will cover the Main Mission Unearthed, which begins as soon as you finish In Their Footsteps. At the end of that quest, The Emissary gives you what they call a key to an Artifact, in order for you to learn more about them firsthand, and the choices you'll have to make from here on. They will bid you to go to the Earth's moon to use it. When you're ready, head for the Sol System and then land on the Nova Galactic Research Station on the moon Luna. Move forward to the station to investigate it properly.

As you move forward, look for the Airlock that should be on your left. It's locked but the Moon Base Key that The Emissary gave you will prove useful here, as well as for the next locked door. Inside the first room should be a Wire Spool as well as some random credits in the storage boxes. Open the folding blue door on the right and progress through. Follow the objective marker to a computer containing Nova Galactic Research. The first file describes the supercomputer that the researchers were using for their experiment, while the second file will contain an announcement about the test launch of something called Project Prism.

As the file reads, you'll next want to head up to the roof and see what you can find out about that launch day. If you turn around and then head through the double door on your right, you should find yourself in a room with gym equipment and various kitchen things. The storage rack near the punching bag has a Storage Box with a Digipick and some Zero Wire if you want them. Head back out and then make a turn to the right to eventually find some stairs leading up. At the top, you'll find a locked Science Crate which you can loot if you have enough investment in the Security Skill. The Storage Crate ahead of it contains a Ground Crew Pack. After you've looted as much as you want, head outside and find your way above the station to get to the recording box and play the recording.

It seems the original data that was integral to the project was kept secret even to the spearhead of the research, but it sounds like you'll be able to find it in NASA. Head back to your ship and chart a course for the NASA Launch Tower on planet Earth.
Down to Earth
After you land you'll see the launch tower from a distance - kind of hard to miss in the middle of a barren wasteland. Head to it and you'll be prompted to try to find a way in. There'll be some Mercury and Water deposits on your way there if you want to harvest them.

If you head to the middle of the structure and then immediately climb to the right, you should find a door with a switch in a dark corner of the platform. Unfortunately, there isn't any power right now, so you'll have to find a way to generate some.

It's quite dark but if you search to the left of the door's switch, you should be able to find two Emergency Power Cells. Pick them both up and then head to the right side of the door to find the Power Receptacle, where you can put one Emergency Power Cell. Now you can hit the switch to open the door. Immediately in front of you as you step in will be a Storage Crate containing a Refined Deep Recon Spacesuit. Beside it to the right is another crate with a Bashing Calibrated Old Earth Unting Rifle, some ammo, and a Calibrated Deep Recon Space Helmet.
Head back out and then turn right to get back to the path in the middle of the structure to cut to the other side. Turn left to circle around the structure until you find some stairs. Head up and then turn right to find some Resources, and another Storage Crate containing an Advanced Deep Recon Spacesuit.

When you're done looting, head back out and down the way you came, and then continue circling the structure to the left until you find your way back to the door with a switch. Climb up to the platform above the Power Receptacle this time and then keep climbing up. There'll be some more Resources scattered around this area if you want them, but you'll mainly want to use the platforms and stairs to make your up to the objective marker. You'll eventually find a white door that you can enter, leading to a short bridge that'll take you closer to the objective marker.

There you'll find the elevator to get to NASA but you'll need power to activate it with the button. If you turn around from the elevator and look to the right, you'll find another white door that you can open with the NASA Access Code. Inside will be another Power Receptacle. If you missed out on grabbing the extra Emergency Power Cell a while ago, there are some lying around this room. Make sure to pick all the extra ones up for later. Interact with the receptacle to put one in. The Storage Crate here contains a Tau Grade Rheostat. Head out of the room and head back to the elevator you just powered and push the button. Press another button inside to get to the NASA Launch Facility.

Loot as much as you want from the cluttered area and then head for the objective marker when you're ready. Access the NASA Research Computer to get some more information on NASA. The first file has some reminders for the launch. The Access Station Logs will have some recordings of past events that transpired here, regarding a sample from Mars that was unprecedented to civilization at the time. It seems the government took pains to keep it all under wraps.
When you're ready, head through the door near the computer. Jump down and follow the path to a large chamber that looks like a museum of some sort, built to commemorate the progressive stages of space travel in humanity's history. Turn to the left and head to the lower level, following the direction of the objective marker. Look for the stairs on your right and follow the path to another room containing another Personal Recording of Judith Tatienne. It seems that Victor Aiza has had breakthroughs upon breakthroughs based on some information that he wishes to keep secret. These breakthroughs eventually led to the discovery and creation of extensive space travel.

Follow the path forward through the rock tunnel and through the long hall. At the end of the hall will be a door marked with the word "Lab" that you'll have to enter. Inside, climb up the rock formation on the ground to a doorway right above you. Follow the succeeding paths down to yet another long hall. You'll find a large red door that you'll need to flip the switch for, but the power for it is out. Head past it first and enter the yellow folding door to the right to find the corresponding Power Switch.

Flip the power on. There's a Refined Deep Recon Space Helmet in the Storage Crate to the right if you want it. Head back now to the large red door and flip the switch to open it. Inside, follow the path through some more rock tunnels until you reach a bit of a fork. The rock wall in front of you is actually breakable. Break it to access a room containing a Digipick, a Storage Crate containing some more resources, and a Deep Recon Spacesuit. Head back out and then make an immediate right turn. Follow the path to find some stairs on your right. Head down and follow the objective marker. There'll be another red door with a switch that'll need some power. Head past it to find the corresponding Power Receptacle and put in the extra Emergency Power Cell.

Head back to the red door and flip the switch to enter it. Follow the path and eventually climb up the stairs. You'll eventually enter a large chamber with some Turret Mk Is and a Robot Model A guarding it, so take them out first. Afterward, head to the far left side of the room to find a yellow box that operates the large doors. You'll need to generate some power again to get it working. From there, you should be able to find an opening to your immediate right. Follow the path to find the corresponding Power Switch.

Head back to the large doors and flip the switch to open them. Follow the long path down toward the objective marker to get to another NASA Research Computer. Access it to progress your objectives. The first file has some reminders in terms of Security Protocol, while the Access Station Logs will have some more recordings. It seems the testing for extensive space travel was successful, and at that time, things were progressing so fast that nobody wanted to even know what the side effects were for operating a Grav Drive. You'll have to find out for yourself.
When you're done with the computer, turn around and look to your left to find a white door. Open it and progress forward. Head past another door afterward into an area where gravity seems to be lower. Float down and loot the body of a dead scientist for some credits and the NASA Maintenance Key. Use the key to open the nearby door and then turn right to find another large red door with a switch. The Storage Crate on the left contains an Advanced Deep Recon Power Pack. Hit the switch to open the red door to proceed.
Inside the next chamber, follow the stairs up to an opening on the grate. Follow the path and then turn right to a door on the lower level. Open the door and then immediately turn right to get to the objective marker, where you'll find Victor Aiza's lifeless body and another NASA Research Computer. Access the computer to proceed.

The first file will show some information about the Grav Drive, and reveal that the Martian specimen is at the core of the machinery. The Access Station Logs will again have some recordings to enlighten you of what transpired before. It seems like all the traveling done from the moon has had negative consequences on Earth, which led to its eventual destruction. Victor Aiza planned on keeping it secret and instead telling the public that nature was simply taking its course and that it was about time for us all to leave the planet anyway. This seemed to be a very big deal for Judith, which Victor knew from the beginning but still chose to keep secret, leading to them falling out. In the final file, Victor confesses that the origin of all the quick advancements in space travel technology is in fact the Martian anomaly they had found. He'd touched it and was able to speak to a version of himself knowing all that came ahead in terms of their field of study. He finishes by calling the specimen an Artifact, as you know it at the current time.
You'll find this very Artifact in the large machinery at the center of the main chamber. Press the switch on the desk to the right of Victor's body to open it and gain access. Head back to the main chamber to claim the Artifact for yourself. You'll immediately receive a message from The Emissary who says that they've landed on Earth so that you can come discuss your findings. The Hunter also says there's another Starborn that got there before they did, probably to claim the Artifact for themselves too. A few of them will come find you as you make your way out so prepare for some fighting.

The quickest way out from here will be indicated by your HUD system. Head down the stairs to the lowest level and then exit the red door. As you move forward there should be a door to your left leading to some stairs. After two flights of stairs, head out the doorway in front of you and then keep going straight in the same direction until you enter a hall going to the left.

Jump the small gap and climb the large pipes to make your way up. When you get to the top, head through the open door you'll see in front of you, opening to the left. Move forward onto a long and wide flight of stairs going up, being careful of any Starborn that might ambush you. At the top, head forward and then to the right to some more stairs. After you've dealt with the Starborn here, look for the large red door on the left, which needs another power cell to be flipped. Follow the wires coming out of the switch to find the corresponding Power Receptacle and put in another Emergency Power Cell.

Flip the switch to enter and then head up the stairs on your left. On your right should be another Storage Crate containing a Calibrated Deep Recon Space Helmet. Follow the path to a grated door which you can open with the NASA Maintenance Key you picked up a while ago. Keep going until you reach another long hallway. At the end of it will be a Cuttable Wall that you can bust through with a Cutter. Go through it and then turn left. Follow the path and then climb up the stairs in the middle of the large room.

At the top, jump onto the silver pipe and then head through the broken window into a hall, being careful of the Starborns engaging you again at this point. Head through two short doorways into another cluttered room, and then look for an open door on the left. Past it will be a closed door you can open and go through, to head up the long inclined path to your right. Follow the path until you reach some more stairs. Keep climbing up until you reach the last door. Enter it and then jump down to find the elevator you used to enter the facility. Push the button to finally make it outside.
Choosing Sides
Drop down safely to find The Emissary and The Hunter waiting for you in the sands. Speak to The Emissary to discuss your findings. She'll ask if you now understand the whole point of this exercise - the scientists invented the Grav Drives through one Artifact, at the cost of their home planet. You can have her explain further with the third option if you want. You'll then have the option to slightly agree with The Emissary's view that this event shows the Artifact's danger or The Hunter's view that being able to finally reach the stars was worth the cost. Regardless of this initial choice, you'll get some more points to consider from both of them before making another choice. The third option this time expresses that their both wrong and someone who's not a Starborn should make the decision. If you choose the third option, the game will prompt you to reconsider or confirm - either side with The Emissary, The Hunter, or neither of them and have both of them as enemies.

Choosing whichever will reveal that once all Artifacts are gathered, everyone is to fight it out at a place called The Buried Temple where the final Artifact can be found. Regardless of who you allied with, the other two parties will be there with their own collected Artifacts, in a fight to win it all. This completes the main part of the Unearthed and will prompt you to finish Final Glimpses if you haven't already. To start the next Main Mission, "Revelation," players will have to finish Final Glimpses, Missed Beyond Measure, and Unearthed.
Hopeful News
These next two sections will cover the Main Mission Final Glimpses. One of the things the Emissary suggests you do is update your fellow Constellation members with what you learned about Unity. Return to The Lodge in New Atlantis and speak to Vladimir to start the Constellation meeting. Tell them about the Emissary and why the Starborn is after Unity, then the meeting will conclude.
Speak to Vladimir afterward to get information on where to find the remaining Artifacts. One of the planets he gives will differ from playthrough to playthrough, but each player will be given Freya III and have to obtain a Ship that can travel at least 21 Light Years. Your Grav Jump range is influenced by a few factors - the Ship's Grav Drive, the Ship's Mass, and your Astrodynamics Skill. If your Ship cannot travel that far with your current stats, you'll have to purchase a new ship with the required specs from any Ship Vendor.
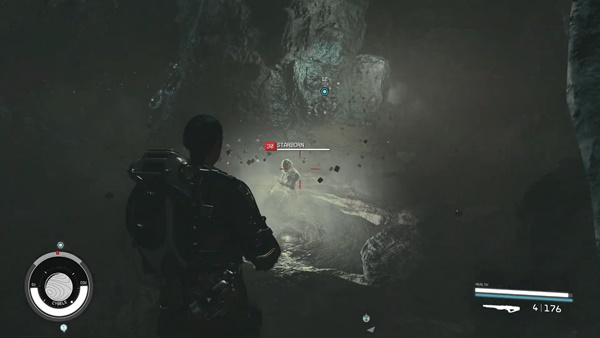
Start by obtaining the Artifact on your randomized Planet. Follow the mission marker to a Spacer base and reach the end to find the Artifact embedded in a Caelumite deposit. Before you're able to grab the Artifact, however, an invisible Starborn will appear and must be taken down before being able to obtain it.
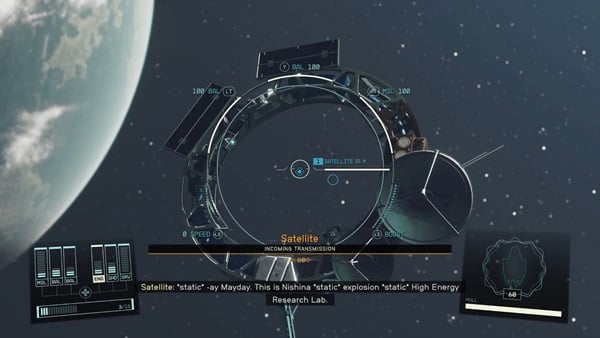
Your next course of action will be to visit Freya III in the Freya System. When you get there, you'll receive a transmission coming from the nearby satellite. Nishina from the High Energy Research Lab is requesting immediate evac due to an explosion at the site. After listening to the transmission, Entangled will begin. This mission must be completed in order to progress Final Glimpses.
Interdimensional Travel
Touchdown on the Nishina Research Station and run up to the intercom of the building. You'll be greeted by Ethan Hughes who doesn't seem phased at all by the distress signal and claims that they didn't send one. When you mention it came from the High Energy Research Lab, however, he'll let you in.

Enter the Nishina Research Station. Ethan will scan you and you'll be let into the facility proper. He'll introduce himself as the Chief of Security and escort you to the Director. As you walk through the Storage room, the environment will suddenly shift, with the building becoming infested and decayed. A Young Cataxi Warrior will emerge from the ground in front of you. Defeat it and you'll be back in the unruined Storage room.

Ethan will be on guard, accusing you of being a stealth tech. No matter what you tell him, he'll continue escorting you to the Director hoping to find some answers. As you enter the Work Room, you'll be transported to the ruins once again. Speak to Rafael Aguerro and he'll be relieved that someone finally responded to his distress signal. He'll ask you how you got in the facility and when you mention Ethan Hughes, he'll claim that he's dead. Rafael will hypothesize that what you're experiencing is due to the accident that he mentioned over the transmission.

As Rafael is explaining how the accident happened, you'll be pulled towards the intact Research Station. Keep following Ethan to he Director's Office on the second floor, and on the way, you'll be pulled back to the ruins. Make it to the Director's Office in this instance of the facility, defeating any Cataxi on your way.
Right before you make it to the office, you'll be transported back to the intact facility. You'll finally be able to meet the Director, Kaia Patel, as well as a scientist, Maria Hughes. When you mention Raphael to them, they'll claim he's dead, confirming your claim that you've been shifting universes. Bring up the Artifact and ask what they are doing with it. They'll explain that the facility's goal is to research the gravitational distortion caused by the Artifact. The accident three months ago caused Raphael's death and they haven't been able to switch off the probe due to a malfunctioning kill switch. Though they could do it manually, the Research Level is locked down and there's no way to get there at the moment. Though the elevator in this universe can't get down there, you can suggest using the elevator in Raphael's universe. Director Patel will agree and Maria will pipe in, suggesting to adjust the parameters on the probe to control your shifting between each universe.

Follow Maria to the control unit. When you get through the first door on your right, you'll be pulled back to Raphael's universe. Follow your mission marker through the Emergency Room and back down to Raphael. He'll give you the Nishina Pantry Key to give you access to the pantry. There will be another Cataxi in this room, but be careful shooting your weapon when entering the Emergency Room as you will be transported back into Hughes' universe. Head into the next room and you'll be back with Rafael. Defeat the three Cataxi and speak to him.

When you're done, move in the room a bit and you'll find yourself back in Ethan's security room. You can ask him more about the scorpions in the universe and he'll unlock a few logs for you to read about the Cataxi. He can then be Persuaded to give you an item that will be helpful in defeating the Cataxi in the other universe. If you choose this option, you'll have three turns to earn 6 persuasion 'points'. Below are some examples of Persuasion options:
- I'll wear you down eventually. Save yourself a headache and just give me what I want to know. (+2)
- I'm sure we can work something out. (+1)
- That's better. Can we move on the the part where you give it to me? (+4)
If you succeed, Ethan will hand over a Rare Experiment A-7 Shotgun. Head out the room when you're done and into the Main Hall towards the lab. You'll be pulled back into Raphael's universe where the way to the lab is blocked. Head further in and circle to the left to find some stairs going up. When you reach the stairs, you'll be back in Hughes' universe and can speak to Maria. She'll turn the voltage of the probe down until a Distortion appears. Stand in the Distortion, and as Maria increases the voltage back up, you'll be transported back to Raphael's universe.
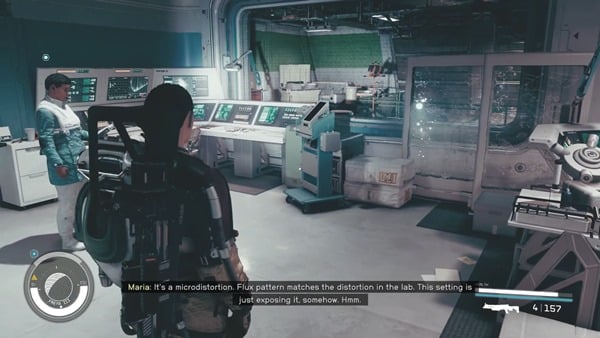
Pick up the Probe Control Unit from the nearby table. Head to the nearby distortion and interact with it to calibrate it. You'll be sent back to Hughes' universe when you do so. Speak to Maria and she'll give you directions on how to reach the High Energy Research Lab. Before you do so, however, go and speak to Director Patel. She's asked Dr. Barakova to provide you with supplies, so if you're short on some, you can approach them later. Director Patel will then ask you which universe you will choose after stopping your ability to shift. Give her your answer and you can be on your way.

Dr. Tatiana Barakova can be found in a sitting room on the ground floor. When you speak to her, she'll give you three Med Packs and a Trauma Pack. Afterwards, head to the distortion at the other mission marker and interact with it to get to Rafael's universe. Take the elevator here down to the research level. Interact with the Distortion to your left as you exit the elevator to get to Hughes' universe. Head straight forward and interact with the Distortion next to the closed door. When you get back to Rafael's universe, the door will be open. Head through and turn right, picking up the Nishina Particle Lab Keycard in the open room.

Interact with the Distortion in the far end of the room to return to Hughes' universe. Exit through the locked doors next to you and enter the locked doors right in front of you, at the opposite side of the room. Head down the stairs and into the next open room on your right. Be quick getting in the room as there's a turret at the corner of the hallway. Interact with the Distortion in this room to get back to Rafael's universe. Exit through the door on the right and head towards the quest marker. You unfortunately won't be able to interact with the console in this universe, so head backwards, away from the console, and you'll find another Distortion behind a cabinet. Transport yourself to Hughes' universe and interact with the Computer to override the Security Systems. You can also calibrate the turrets to be friendly towards you on this console.

Head into the now open Secure Access door and into the Particle Accelerator room. Continue all the way downstairs and head through the closed double doors. In this larger room, head up the staircase on the opposite side of the room and interact with the Distortion found to the left at the top of the stairs. In Rafael's universe, head through the open door next to you that says Emergency. Make your way down the stairs to the left and you can interact with the Distortion here to aviod the the two Cataxi. You'll find the Nishina Utility Closet Keycard in the desk nearby in both universes.

Right now, you should be in Hughes' universe. Head back up the stairs you came from and interact with the Distortion next to the closed security door to get back to Rafael's universe. The security door should now be opened, so head on through and up ahead will be another Distortion. Return once more to Hughes' universe and head downstairs towards the mission marker. You can open the door at the corner to enter the Utility Closet. Another Distortion can be found here to shift back to Rafael's universe. Head into the next room where the mission marker is and interact with the Distortion behind you. In Hughes' universe, you can interact with the Computer to override the Security Systems here. There are no turret controls here, however, so you'll have to shoot down the turret in the room and any other robots you encounter in the future.

Interact with the Distortion again, then with the Distortion in the Utility Closet to leave the room in Hughes' universe. Head up the stairs and towards the mission marker into the room on the left. Interact with the Computer here to override some more Security Systems. Exit the room and head straight ahead to reach some stair going down. Descend the steps and enter the Access Tunnel to the right. Go all the way to the end to find a Weapon Case with an Epic Novablast Disruptor. About halfway through the room behind you is another Distortion. Interact with it to get to Rafael's universe.

Enter the large hole where the Weapon Case was and follow the tunnels. There'll be a lot of Cataxi in the area so be careful. You'll eventually get to a Distortion at a dead end. You don't want to interact with it, instead, turn around and head up the slope on the left in the large cavern. This will let you climb up towards the mission marker. Take the Distortion up here back to Hughes' universe. Exit out the door and head into the next room to your left. Defeat the turrets and robots here and interact with the Distortion in the back right of the room. In Rafael's universe, head through the nearby hole in the wall in the back of the room and follow the tunnels up and into another section of the facility. Circle around to the quest marker and interact with the Distortions here to return to Hughes' universe.

The Computer in this room will allow you to override the Security System in the Storage Room. Make your way through the open security door and head up the staircase ahead. Turn right and interact with the Distortion at the bottom of the next set of stairs. Climb up the stairs in Rafael's universe and keep moving forward until you reach the mission marker and the objectives change.
In this larger room, you will have to decide which universe to save - Rafael's or Hughes' with all the other Research Lab employees. Disengage the Power Interlocks in the universe you want to stay in by interacting with the computers noted by mission markers. In Rafael's universe you'll have to fight Cataxi while moving around the room, while in Hughes' you'll be fighting robots and turrets. After you've disengaged all the power interlocks, shut the probe down and take Artifact Lambda from the center of the mechanism.

After experiencing the usual visions, speak to with Rafael or Director Patel. If you saved Rafael's universe, he'll offer to become one of your Crew Members and give you a variety of Resources to use. If you saved Hughes' universe, you'll be rewarded with a Legendary Experimental Nishina Spacesuit and a Legendary Experimental Nishina Helmet. This will conclude both Entangled and Final Glimpses.

Saying Goodbye
This next short section covers the Main Mission Missed Beyond Measure. When you arrive at The Lodge, after the events of In Their Footsteps, you'll be stopped by Noel when you approach the rest of the Constellation members. She'll say that she wants to gather everyone to properly say goodbye to the crew member who passed away, depending on the player's choices, during the events of High Price to Pay. If you tell her that you'll be there, she'll say she'll need some time to prepare for the funeral event.

You can actually choose to complete Unearthed and Final Glimpses first if you want to, but whenever you're ready and don't want to wait out the full days to complete this Mission, you can actually go to your dedicated room here in The Lodge and interact with the bed there to find an option to 'Wait until Memorial.' When you wake up afterward, your chosen active Companion will no longer follow you, and you'll also have the option to wait it out for another 24 hours to skip the Memorial altogether.
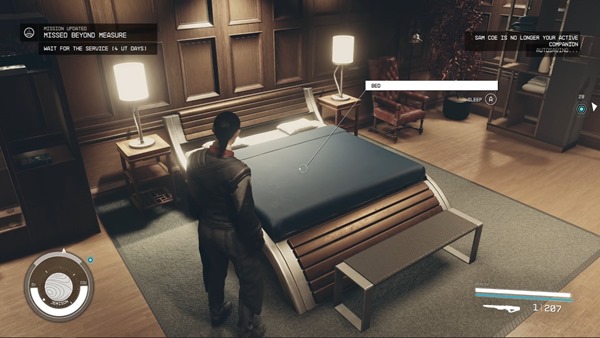
When you're ready, head out the door of your room and head to The Lounge's main table to attend the memorial service. You'll have gotten there right at the end of one of the member's speeches dedicated to your deceased member. Interact with the podium and say a few words yourself. Your speech will be made up of some choices that you'll be prompted to make. Regardless of how you construct it, Noel will thank you for your words. You'll then have the option to check on everyone during this event, which will give you opportunities to raise your affinity with them. Additionally, Aja Mamasa, the previous chair of Constellation is also here for you to speak to for the first time.

If Barrett survived and you speak to him here, he'll tell you that he seems somewhat detached despite knowing the gravity and sadness of the situation. If you tell him that you know what he means on some level, he'll then share a nice little genuine thought. Thanking him for it gives you a large amount of approval.
When you're ready, simply head out the main door of The Lodge to complete the Mission.
Final Space Battle
The following sections will cover Revelation which begins as soon as the player finishes the last Mission they chose to complete in the set of Missions consisting of Entangled, Final Glimpses, Missed Beyond Measure, and Unearthed. After completing all of them and collecting all available Artifacts, the player will now have to make their way to the Buried Temple to fight for the final Artifact, as well as all the Artifacts held by the opposing parties that the player chose to not side with at the end of Unearthed. Your first step will be heading to the Masada System and selecting planet Masada III. Depending on how far you've explored outside of the Main Missions thus far, you might have to go through some other Star Systems first to get there.

When you get to Masada III, you'll be ambushed by whoever you'd chosen to oppose, in their corresponding ships. Make sure your ship is well-equipped and thoroughly prepared. After the fight, land your ship on the Buried Temple. Once you do, your chosen ally will come meet you and you can ask them any questions you might have regarding the Buried Temple and why they seem to always have the final bout in this place. They'll be following you throughout your time on this planet. Head for the military base where your objective marker is pointing. As your ally would've said, the actual temple lies beneath it. Head first for the opening in the middle of the facility. Inside, there will be a little of dead bodies you can loot if you'd like to.

Follow the trail of dead bodies toward your objective marker. As your ally has probably warned you multiple times by now, you'll get jumped by your first Starborn here as you traverse the area so be ready for some fights. You'll have to defeat them before moving forward. As you're already nearing the end of the game, expect these fights to be some of your more difficult ones. Guardian Musa's chosen power is to create copies of himself so you'll have to contend with a number of them at once. To get through this objective, you'll have to defeat all the copies. When you're done with them, keep moving forward toward the objective marker. You'll eventually be blocked by large double doors, so turn left first into a tunnel-like path. As the tunnel sort of unravels, keep an eye on the left side for a locked Storage Crate with an Advanced Security Level containing an Advanced Shocktroop Spacesuit, if you want it. Otherwise, move into the warehouse to enter the area directly above the Buried Temple.

Inside, you'll be jumped by another Starborn so deal with them promptly. Guardian Athaliah brings the dead back to life under his command and he won't be targetable at first until you bring down every Ecliptic he revives. He can also switch places with any of his thralls. Make short work of them and then deal with Athaliah to move forward. Make sure to take note of where he dies as you'll want to find the Ecliptic Base ID Card to move forward.

Trip Down Anomaly Lane
After grabbing the Ecliptic Base ID Card, follow the objective marker to the large red double doors. Interact with the ID Card Reader to open them and head inside to the Ecliptic Base. Inside, move forward by heading first to the lower levels. Jump down the gap in front of you and then turn to the left. When you reach a small room, turn to the left again to find some stairs heading further down. Before you head down, you can get a Berserker Advanced Solstice in the storage box on the table beside the stairs if you want it. Down the stairs, turn left again and then hang another left when you exit to head toward the objective marker, which right now leads to some kind of anomaly. Move close to the lights to enter it.

It will take you to a familiar scene at the beginning of the game before you touch your first Artifact, marked by the presence of Lin and Heller. Follow the path toward the Artifact to reach the lights made by the anomaly again and exit the anomaly. When you get back, your chosen ally will inform you that you dipped into a different universe for a while and that you'll have to do it a few more times to get to the center of the temple. It seems where (or when) they go in that quick slip into space-time also depends on the person. Move forward to get ambushed by your next Starborn fight.
You'll be up against two this time - Guardian Teuta and Guardian Rinn. These two will seem to have some power to manipulate objects, and Rinn in particular seems to like keeping himself safe while throwing some items to harm you. They'll also have some turrets and robots on their side so this fight can be a bit annoying. If you want to, you could enter the control room in the middle of the fight where Guardian Rinn will appear at the beginning, but you'll need to either take out Rinn first and loot the Ecliptic Base Key early or hack the door with a Master Security Level lock and then hack the computer inside with an Expert Security Level to stop the robots.

Regardless of how you do it, defeat the two Starborn and get the Ecliptic Base Key to move forward. Head to the upper levels and follow the direction of the objective marker to a large yellow door which you can go through with the key. Inside, follow the path through some dead scientists until you reach another anomaly as you go through a corridor. When you touch the lights, this time you'll find yourself in the Scow, with Captain Petrov. Move forward and speak to him. Regardless of what you choose, it will end in a fight. You can dispatch three quickly or you can just kill Petrov to loot the Private Quarters Key from his body, and then go down the stairs on the right to find the anomaly and leave without having to kill the rest. You can also find The Collector's Outfit and a Modified Calibrated Solstice on Petrov's body.

Use the key on the door to Petrov's room to find the anomaly. Touch it to get back to the present time and place. Once you're back, move forward past the large open doors and follow the path along the cave. At the end of the path, take the lift down to the Cavern. On your way down, you'll naturally touch another anomaly. This time it takes you to a universe where your counterpart dies in the arms of Vladimir, as you see unfold right in front of you. You'll have the option to simply speak to Vladimir or even attack him if you want to. Regardless, you simply need to turn around to find the lights that'll allow you to leave.

Lovers and Fighters
Once you reach the lowest level, you'll find tons of supplies as you get off the elevator. You'll also find a Cornered Modified Auto-Rivet, a Space Adept UC Naval Cutlass, and an Osmium Dagger among the supplies, should you want them. When you're done looting, move forward along the path. Eventually, you'll reach a large open cavern where you'll be ambushed by another Starborn, Guardian Fionn. Fionn has the power to create duplicates that carry and use the same Equipment as you and your current team members. This means, as your offensive power should be notable at this point in the game, they'll also be quite annoying in terms of the damage they can deal. Nevertheless, they'll be quick to dispatch with their smaller health pools, and then you can focus on defeating Fionn.

After dealing with Guardian Fionn, move forward to the objective marker. Narrow pillars dotted with tiny stars will give way to the doorway behind. Interact with it to finally make it to the Buried Temple. Inside, you'll be confronted by either The Emissary, The Hunter, or both of them, depending on who you'd chosen to align with or if you'd chosen to align with neither of them. There's an option to try to persuade them if you want to. You'll need to get eight points within three turns initially in order to successfully persuade either of them.
If you try to persuade The Hunter, you can have the following initial options, depending on your playthrough:
- +1: You could lose. Handing me the Artifacts guarantees you'll live.
- +3: If a more persuasive version of myself wanted to pop in from another universe, now's the time.
- +5: You can find peace in this universe. Like your other self. There's more to life than the hunt.
If you're successful with the third option, you can have the following additional options to continue:
- +1: You could lose. Handing me the Artifacts guarantees you'll live.
- +3: I'm offering you a chance to stop this cycle of death.
- +3: There has to be a universe where I've already won this.
If you're successful with either the second or third option here, you'll be able to persuade The Hunter to give up his Artifacts without a fight.

If you don't manage to persuade them or choose the attack them from the get-go, you'll begin the fight against the final Boss of the game. The Emissary and The Hunter are meant to be the strongest Starborn ever, outside of yourself, so they'll have a variety of different powers to help them, having passed through the Unity over and over. This fight can get especially hard if you'd chosen to go against both of them. The fight will have a lot of teleporting through the different places you've been in, so prepare yourself for a visually dramatic battle.
After the successful Persuasion, or winning the fight, and acquiring the corresponding Artifacts, you'll have to speak to your ally if you'd chosen to align with one. They'll give you all the Artifacts that they have to complete the entire set. When you're done speaking to them, or if you're ready, move forward to claim Artifact Mu.

After the usual vision, you'll find yourself outside of the Buried Temple, and Revelation will officially be completed.
Ascension
With all the Artifacts now in your hands, you'll be able to complete the Armillary. Before you do so, however, you can visit your friends and tell them about your accomplishments. Now will be the last time to speak to your Companions and your other Constellation friends at The Lodge and The Eye to say your goodbyes. Though it won't matter much at this point in the game, you'll gain a lot of approval from any Companion you speak with.
Whenever you're ready, hop onto your ship and build the Armillary using the computer on board. Take off from whichever planet or moon you're on and power up the Grav Drive to automatically boost to the Unity. Take in the sights and walk forward. You will eventually come face-to-face with yourself. Answer their questions however you like, then they will offer you a choice - either walk into the gate of light and become Starborn, or turn around and walk away back to the people and universe you know.

Before you make the decision, you can walk around and approach the visions of people you know. When you approach the Constellation table, your other self will explain that Constellation will go on to publish all they know about the Artifacts, the Starborn, and the Unity. If you sided with the Emissary, you will learn that she seeks out other noble Starborn to help them become reborn. If you sided with the Hunter, his views of seizing power will spread to other Starborn in the universe. If you sided with none of them, the path to Unity is left for the people of the Settled Systems to discover on their own, uninterrupted by Starborn.


You'll then have to make your decision. If you leave the Unity behind, you'll be back on your Ship with all the Artifacts. The game will not end and you'll be able to finish anything you left behind previously. Whenever you're ready, you can freely rebuild the Armillary and Grav Jump back to the Unity To finish the game, walk into the giant ball of light. You'll be shown some more beautiful images of the universe and the credits will roll.

Once the credits are done, New Game Plus will begin in One Small Step - you will retain all your character levels, Skills, and Powers, but lose your Items and relationship progress with your Companions.
